what kind of stone is best to carve words into
Dan is a licensed electrician and has been a homeowner for 40 years. He has nearly ever washed his own repair and comeback tasks.
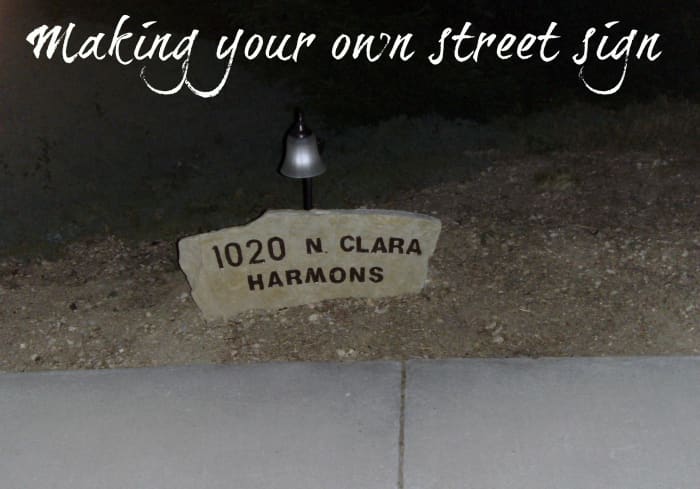
Making your ain street sign from engraved stone isn't hard.
Wilderness
How to Engrave Your Own Rock House Sign or Accost Marking
Engraved stone monuments have become very popular with the application of lasers and other tools for engraving. Nosotros often see them at the archway to subdivisions, shopping centers, major stores, and the similar. They tin can be quite beautiful simply expensive and usually require more simple muscle to get them into identify.
A small version tin exist made into a house or street sign, all the same. You tin can create a smaller stone with a street accost and perhaps an engraved proper noun. This is easily within the abilities of well-nigh any homeowner with merely a few tools, can exist carried and placed with relative ease, and tin provide that necessary address sign for your home.
The stone sign shown in a higher place cost me $8 and a little paint. That's about how much ownership regular steel letters to boom to the front of the house would have been. Yes, it took a while to brand, but information technology certainly looks better and is even more visible than such letters.
This engraved stone sign would brand a great outset project for the homeowner learning to practise their own home improvement projects.
Footstep 1: Cull the Base Stone and Consider Location
- For a street sign, a apartment slab of stone is probably best. Yes, a behemothic 2-ton boulder can be used if an appropriate location is available, simply be enlightened that you cannot move it without heavy machinery.
- Be aware of the proposed location. When I fabricated mine, I knew it would remainder on an area that started flat but and so curved down to the left. While one edge of the rock could be buried in the ground (and should probably be cached to some degree), it made the task easier to find a piece that already had some curve to it.
- Choose the type of rock carefully. I used sandstone, a soft, easily worked type of rock readily available in apartment slabs of various sizes. This slab was approximately iii feet by 2 feet by around viii inches and weighed virtually 100 pounds: big enough for a sign yet small enough to handle. Other types of stone will weigh different amounts for a given dimension. I bought it for $viii at a local nursery that carried diverse stone products and plants and copse while shopping for stone pavers for a new patio.
- This is not a job to be accomplished in an hour. My project required about 4 hours to complete, and then make certain you take a comfortable area to piece of work in.
- You volition need the rock to be placed on a firm surface at a reasonable tiptop for work and in an area large enough to work all around the rock. A Blackness and Decker Workmate proved to be the perfect meridian and could easily agree the stone. A small office chair on wheels provided a comfy seat to work from and was easily rolled around as needed.
- A set up of stencils will be invaluable. Two inch stencils are on the small side to be visible from the road, while four inch stencils are probably on the large side for most sizes of firm sign. For this sign, 4" stencils were chosen for the numbers while the residue were a 3" size. Simple block letters are preferable as they will be easier to engrave, but a fancier curved font could be done with more endeavour.
- Some method of grooving the stone around the stencil is necessary to forestall chipping out as well much stone. A dremel rotary tool was used with a straight cutting scrap; while this bit did the job admirably a harder rock volition probably require a diamond-tipped bract of some kind—another reason to stick with sandstone. A hammer, ½" cold chisel, tape measure out and pencil were the only other tools used.
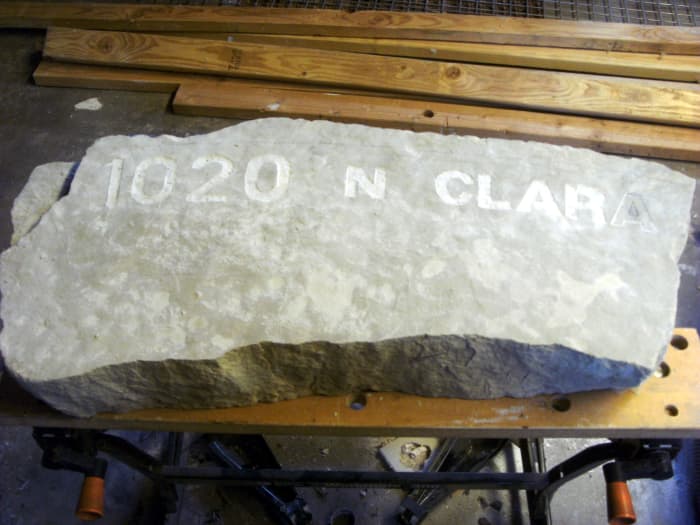
Stone slab to exist made into a sign. Engraving has been started already.
Pace 3: Engrave the Stone
The first step is to transfer the stencils to the stone.
- Lay out the stencils as desired for a pleasing appearance. For my project, I drew a gentle curve on the curved rock as a guide for stencil placement and laid the stencils onto the surface, centering them as well as possible, because the uneven edges.
- Using a pencil (it will launder off easily), draw the numbers and letters on. If two rows are needed, be aware that much of the pencil marking will be removed on the second row, and information technology may well take to be redone. The marks come up off of the stone very easily, and just rubbing your hand over them will remove a good deal of whatever markings.
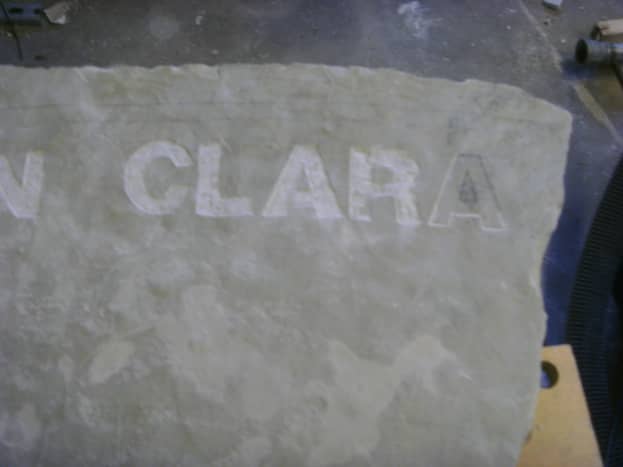
- Using the rotary (dremel) tool, carefully groove the outside edge of all the letters to a depth of around 1/eight inch. Deeper cuts may exist made by making repeated passes with the tool, only more work with the hammer and chisel will also be required.
- Stencils do not give a consummate letter of the alphabet due to the necessity of belongings the stencil together; it will exist helpful to hand-draw these last few lines and then that the grooving process does not remove stone where information technology should remain.
- As cutting stone is difficult work, it is probably a good idea to groove merely ane letter at a time, chisel it out while the tool rests and cools, and then groove the next.
- Using the hammer and chisel, chip out the stone, again to a depth of around ane/eight". Concord the chisel at around a 30º angle and strike lightly with the hammer. A hard blow is unnecessary; the hammer I used was a very lightweight i intended for machine trunk work.
- Change the chisel'due south angle every bit necessary to remove just the right size of chip. A steep angle will dig deeper but take a tiny bit (if any), while a very shallow angle will have a large fleck that is very thin.
- Vary the bending of the chisel constantly co-ordinate to what you are doing. Never prepare the chisel at the groove and bit towards the outside of the letter; this will chip away stone outside the intended area.
- Take extra caution when chiseling at the groove. The groove prevents chipping outside the letter, but it will do and so anyway if you fleck directly at the groove.
- I used a ½" chisel, but either wider or narrower will work. Just make sure that the chisel volition fit easily between the grooves you have made with the rotary tool. Far better to take to scrap twice downward each letter of the alphabet to get the proper width than to take a gouge out where you didn't want to.
Photos to Prove the Engraving Process
Step 4: Finishing Touches
- Make clean the stone. With the engraving finished, clean the rock by either vacuuming it or washing it with a garden hose and letting it dry out. It simply needs to be clean enough to pigment, so all that is needed is to remove the modest rock chips and dust from the lettering.
- Paint. Each alphabetic character needs to exist advisedly painted with a small artist'southward brush. Black is a standard colour, but others tin work as well; I used night brown/red paint to accent the letters. The paint will probable demand to be redone in a few years. Epoxy-type paint volition concluding longer but will be more challenging to work with before it sets up. It will accept a while to paint all the letters advisedly.
- Ready the site. A shallow trench was dug in the ground to accept this monument sign and hold it upright, but it could also have been braced with steel rods driven into the ground.
- Consider light. In this example, a minor solar lite from a set of landscape lights was placed over the sign to provide some lighting at nighttime.
This house is set at an bending to the street so that the house number is not readily visible, but this engraved sign fulfills that requirement far improve than some numbers painted on the curbing always would.
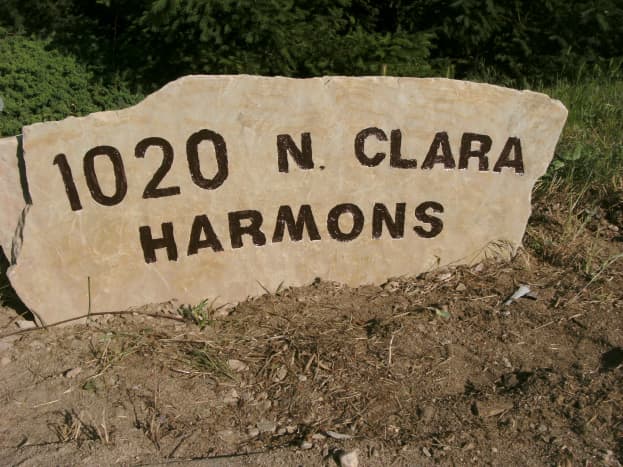
Completed stone sign, set into place
Coil to Continue
Read More From Dengarden
This article is accurate and true to the best of the author's noesis. Content is for informational or amusement purposes only and does not substitute for personal counsel or professional advice in business concern, fiscal, legal, or technical matters.
Questions & Answers
Question: What Dremel and $.25/attachments did you lot use for your rock carving? I plan on doing something similar to a 40" sandstone block.
Reply: I used a tool similar to the ones found hither: https://www.amazon.com/Carving-Expert-Double-Tungs...
© 2011 Dan Harmon
Dan Harmon (writer) from Boise, Idaho on May 02, 2016:
I used a simple oil based house paint. Information technology needs re coated now, but has been several years. Adequate, in my mind.
Karen on May 02, 2016:
What type of pigment did you employ? My daughter has a cornerstone accost marker on her house, but the pigment has faded on the numbers. I know you said epoxy is all-time but difficult to work with. What would be best?
Thank you for your assistance.
Dan Harmon (author) from Boise, Idaho on October 22, 2012:
@ Simply ask Susan: I incertitude that shale would practice very well. Information technology tends to chip and suspension on flat planes, and is fairly hard and breakable likewise. Sandstone was used here; a very soft rock with almost no mistake lines in information technology, and makes it easy to remove fabric just where it needs to be.
jellygator from USA on October 18, 2012:
This is pretty cool! I used to have one with a Kansas Jayhawk. Now I know how to brand 'em. They're a popular item that is for auction all around hither, but I oasis't seen personalized ones.
Judi Brown from Uk on October xviii, 2012:
You brand all these projects look so easy! Your firm sign looks great - don't know if I'm up to it though (I know my married man isn't)!
Susan Zutautas from Ontario, Canada on Oct 18, 2012:
What a great thought! I take tons of shale stone, and all the tools needed to do this, also equally your instructions. Cheers!
This volition work with shale right?
Natasha from Hawaii on October 18, 2012:
I had no idea 1 could make an engraved stone sign at home. That is really cool!
Angelo52 on Oct xviii, 2012:
Great idea. Looks like even an amatuer stone cutter can get this one done. Add a dust mask and goggles and good to go. Dandy article.
Jill Spencer from United states on October xviii, 2012:
Looks like a good weekend project (for my husband)! Voted up, awesome & shared. --Jill
Lela from Somewhere near the heart of Texas on October 18, 2012:
I'll bet you could observe some good blank stones at a quarry or a rock shop. We really did a wooden sign for our house, merely I suppose there are restrictions involved in a subdivision or urban area.
I wonder if yous could make your own headstone!
Penelope Hart from Rome, Italy on Oct eighteen, 2012:
Voted across the board on this one and pinned etc. I think information technology's a great projection. I honey information technology. Wonderful directions how to practise it as usual. Fantastic stuff. A rock sign accost is a great thought to make your home to special!
Dan Harmon (author) from Boise, Idaho on October 02, 2011:
Thank you! It was a quick and easy project and really improved the look of our holding.
Interestingly, some company came by a couple of weeks after engraving this street sign, offering to paint numbers on the street curbing. They wanted twice what I paid and it would have been downright ugly!
RTalloni on October 01, 2011:
Great item for an unusual project. This is a corking solution to ugly house signs! :)
Voted up and bookmarked.
Source: https://dengarden.com/landscaping/make-your-own-engraved-stone-monument-house-sign
0 Response to "what kind of stone is best to carve words into"
Post a Comment